Honda Crv Battery Replacement: Quick Tips for a Smooth Swap
Is your Honda CRV acting slow to start or showing warning signs of a weak battery? If you’ve noticed dim lights or trouble turning the key, it might be time for a battery replacement.
But don’t worry—you don’t have to be a car expert to get it done right. This guide will walk you through everything you need to know about Honda CRV battery replacement, so you can avoid unexpected breakdowns and keep your vehicle running smoothly.
Keep reading to learn how to choose the right battery, when to replace it, and simple steps to ensure your CRV stays powered up.

Credit: www.amazon.com
Honda Crv Battery Replacement
Signs Your Battery Needs Replacing
Knowing when your Honda CRV battery needs replacing can save you from sudden breakdowns. Batteries wear out over time and show clear signs before failing. Spotting these signs early helps keep your vehicle running smoothly. Pay attention to these common indicators of battery trouble.
Slow Engine Crank
The engine turns slowly when starting your CRV. It takes longer to start the vehicle. This means the battery is weak and losing power.
Dim Headlights And Electrical Issues
Headlights appear dimmer than usual. Other electrical parts like radio or dashboard lights may flicker. These are signs the battery can’t supply enough energy.
Warning Light On The Dashboard
A battery warning light may glow on your dashboard. This light shows a problem with the battery or charging system. Never ignore this warning.
Corroded Battery Terminals
White or blue powder around battery terminals shows corrosion. Corrosion blocks electrical flow and weakens the battery. Cleaning or replacing the battery might be necessary.
Old Battery Age
Batteries usually last 3 to 5 years. If your battery is older, it may fail soon. Consider replacement even if no other signs appear yet.

Credit: www.reddit.com
Read more: Honda Crv Won’t Start But Battery is Good: Troubleshooting Tips
Choosing The Right Battery For Your Crv
Choosing the right battery for your Honda CRV is very important. The battery powers your car’s engine and electronics. Picking the wrong battery may cause starting problems or shorten battery life. It is best to select a battery that fits your CRV’s needs exactly.
Several factors affect battery choice. Size, power, and type all matter. Using the right battery ensures your CRV runs smoothly in all weather. It also helps you avoid extra costs and repairs.
Battery Size And Group Number
Battery size must match the space in your CRV’s engine bay. The group number shows the size and shape. Using the correct size prevents installation problems. It also ensures the battery stays secure while driving.
Cold Cranking Amps (cca)
Cold Cranking Amps measure how well a battery starts your car in cold weather. Higher CCA means better starting power. Choose a battery with enough CCA for your climate. This helps your CRV start easily in winter.
Battery Type And Technology
Most CRVs use lead-acid batteries. Some newer models may use AGM (Absorbent Glass Mat) batteries. AGM batteries last longer and resist vibration. They cost more but offer better performance in tough conditions.
Battery Warranty And Lifespan
Look for batteries with a good warranty period. Longer warranties show confidence in battery quality. A good battery lasts three to five years. Check the warranty to avoid extra costs if the battery fails early.
Brand Reputation And Reviews
Choose batteries from trusted brands. Read user reviews to learn about real experiences. Reliable brands often provide better quality and service. This helps you pick a battery you can trust for your CRV.
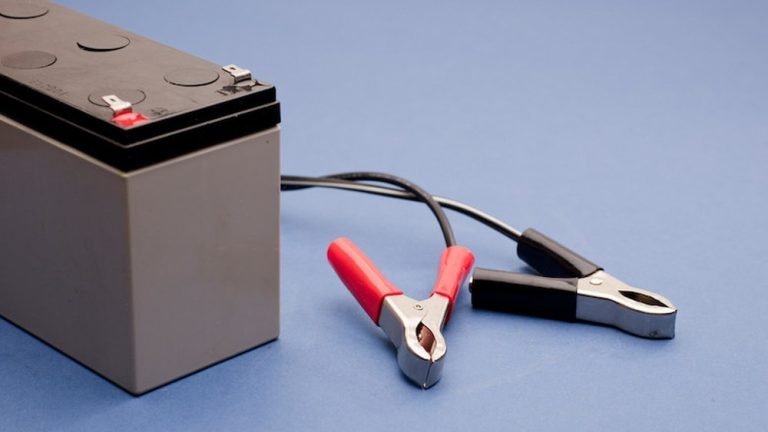
Tools Required For Battery Replacement
Replacing the battery in a Honda CR-V requires a few simple tools. Having the right tools makes the job faster and safer. Each tool has a clear purpose to help remove and install the battery correctly.
Prepare these tools before starting to avoid interruptions. The list is short but essential for a smooth battery replacement.
Read more: Honda Crv Won’t Start Push Button: Troubleshooting Tips
Socket Wrench Set
A socket wrench set helps remove the battery terminals and hold-down clamp. Different sizes fit various bolts on the battery. A 10mm socket is often needed for Honda CR-V batteries.
Screwdriver
A flathead or Phillips screwdriver may be needed. It helps loosen clips or covers around the battery area. It can also assist in prying off connectors gently.
Battery Terminal Puller
This tool removes tight battery terminals without damage. It prevents twisting or breaking the cable ends. Not always necessary but useful for stubborn terminals.
Gloves And Safety Glasses
Protect your hands and eyes from battery acid and debris. Gloves keep your hands clean and safe. Safety glasses shield your eyes from sparks or acid splashes.
Wire Brush Or Battery Cleaner
Clean battery terminals and clamps for better connection. A wire brush removes corrosion and dirt. A battery cleaner spray also helps maintain good contact.

Credit: www.oreillyauto.com
Step-by-step Battery Swap Guide
Replacing the battery in your Honda CRV is simple with clear instructions. This step-by-step guide helps you change the battery safely and quickly. Follow each step carefully to avoid damage and ensure your vehicle starts smoothly.
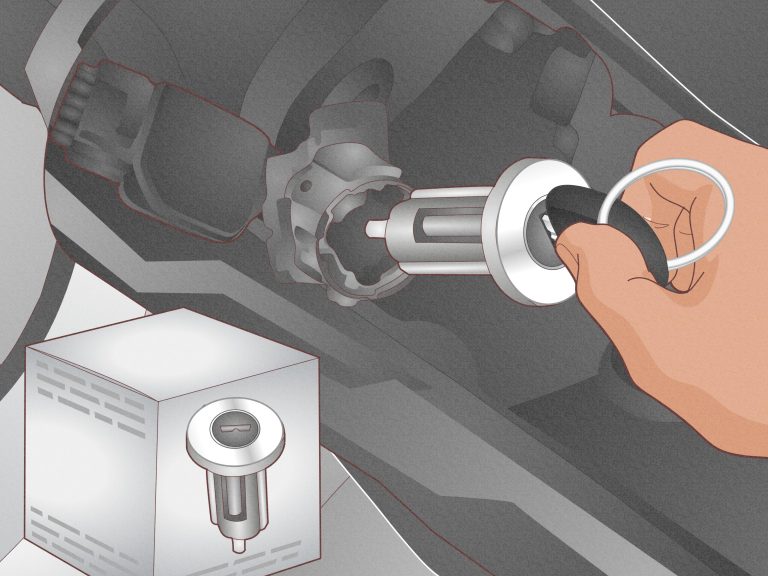
Prepare Your Tools And Safety Gear
Gather a wrench, gloves, and safety glasses before starting. Turn off the engine and remove the keys. Open the hood and locate the battery. Safety first. Protect your hands and eyes.
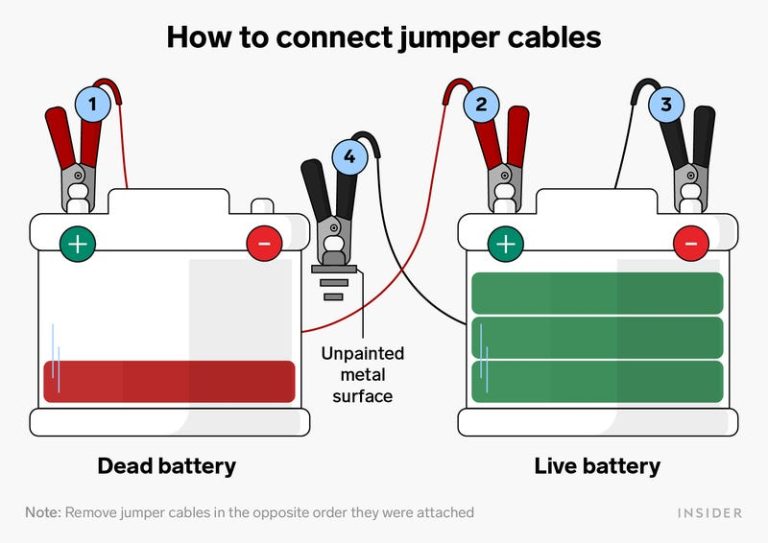
Disconnect The Negative Terminal
Find the negative terminal marked with a minus sign (-). Use the wrench to loosen the nut. Remove the cable from the battery post. Keep the cable away from the battery to avoid sparks.
Disconnect The Positive Terminal
Locate the positive terminal marked with a plus sign (+). Loosen the nut with your wrench. Remove the cable carefully. Do not touch both terminals at the same time.
Remove The Battery Hold-down Clamp
Find the clamp that holds the battery in place. Use the wrench to loosen and remove it. Lift the clamp away carefully. This step frees the battery for removal.
Lift Out The Old Battery
Grip the battery firmly with both hands. Lift straight up to avoid spilling acid. Place the old battery on a safe surface. Handle with care to prevent damage.
Install The New Battery
Place the new battery into the tray carefully. Align the terminals to match the cables. Secure the battery with the hold-down clamp. Make sure it is tight and stable.
Reconnect The Positive Terminal
Attach the positive cable to the positive terminal. Tighten the nut with the wrench. Check the connection is secure and firm. This step powers your vehicle’s system.
Reconnect The Negative Terminal
Attach the negative cable to the negative terminal. Tighten the nut firmly. Ensure the cable is secure and does not move. This completes the electrical connection.
Check And Test Your Work
Close the hood securely. Start your Honda CRV engine. Listen for smooth starting. Check that all electrical systems work properly. Dispose of the old battery at a recycling center.
Post-replacement Checks And Maintenance
After replacing the Honda CRV battery, some checks help keep the vehicle running well. These steps make sure the new battery works correctly and lasts longer. Regular maintenance reduces the chance of future battery problems.
Check Battery Connections
Make sure battery terminals are tight and clean. Loose or dirty connections cause poor power flow. Use a wrench to secure the clamps. Wipe any corrosion with a baking soda solution. Good contact helps the car start smoothly.
Test The Charging System
Start the engine and check the voltage with a multimeter. The voltage should be around 13.5 to 14.5 volts. This shows the alternator charges the battery well. Low voltage can mean alternator or wiring issues.
Inspect For Battery Leaks
Look around the battery for any fluid leaks or cracks. Leaks can damage the car’s electrical system. Replace the battery immediately if you find any damage. A healthy battery stays clean and dry.
Monitor Battery Performance
Keep an eye on how the car starts over the next days. Slow starts or dim lights may mean battery problems. Test the battery regularly, especially before extreme weather. Early checks help avoid being stranded.
Maintain Battery Cleanliness
Clean the battery surface often to prevent corrosion build-up. Use a soft brush and mild soap with water. Dry the battery fully before closing the hood. Clean batteries last longer and work better.
Frequently Asked Questions
How Often Should I Replace My Honda Crv Battery?
Most Honda CRV batteries last 3 to 5 years before needing replacement.
What Signs Indicate My Honda Crv Battery Is Failing?
Slow engine start, dim lights, and electrical issues often signal battery problems.
Can I Replace My Honda Crv Battery Myself?
Yes, with basic tools and safety steps, you can replace it at home.
What Type Of Battery Fits A Honda Crv Best?
Use a group size 35 or 51R battery with 12 volts for Honda CRV.
How Much Does Honda Crv Battery Replacement Usually Cost?
Battery costs range from $100 to $200, including installation fees.
Conclusion
A healthy battery keeps your Honda CRV running smoothly. Regular checks help avoid sudden breakdowns. Replace the battery when it shows signs of wear. Choose the right type for best performance and safety. Proper installation ensures your vehicle starts every time.
Taking care of the battery saves time and money. Remember, a strong battery means a worry-free drive. Stay prepared and keep your CRV ready for every journey.