How to Disconnect Jumper Cables Safely and Easily
To disconnect jumper cables, turn off both vehicles. Remove the black (negative) cable from the previously dead car, then from the booster car. Next, remove the red (positive) cable from the booster car, then from the dead car. Avoid cable contact to prevent sparks or short circuits.
Many car owners have been there, staring under the hood, unsure of what to do next. Knowing how to disconnect jumper cables safely is crucial for both your car’s health and your peace of mind. This guide will walk you through the simple steps needed to safely disconnect jumper cables after a successful jump-start, ensuring that you avoid any mishaps or potential damage to your vehicle.
You’ll gain confidence in handling this common roadside task, and the best part is, you’ll be prepared for any future battery hiccups. Keep reading to learn how to make your car battery woes a thing of the past.
How to Disconnect Jumper Cables Safely
Preparing To Disconnect
| Step | Action | Details |
|---|---|---|
| 1 | Turn off both vehicles | Ensure both engines are off to avoid electrical hazards. |
| 2 | Remove black cable from dead car | Start with the negative terminal on the previously dead battery. |
| 3 | Remove black cable from booster car | Next, disconnect the negative terminal from the helper vehicle. |
| 4 | Remove red cable from booster car | Disconnect the positive cable from the live battery. |
| 5 | Remove red cable from dead car | Finally, remove the positive cable from the formerly dead battery. |
| 6 | Keep cable clamps from touching | Prevent clamps from touching each other or metal surfaces during removal. |
Disconnecting jumper cables safely is crucial for your vehicle and personal safety. Before you begin, take a few moments to ensure you’re ready for this task. Proper preparation can prevent electrical hazards and protect your car’s battery.
Read more: Hyundai Sonata Won’t Start But Battery is Good: Troubleshooting Tips
Preparing Your Surroundings
Park both vehicles safely. Ensure they are not blocking traffic. Make sure the parking brake is engaged on both cars. This will keep them from moving while disconnecting cables. Check for any loose objects around the work area. Clear them to avoid tripping or accidents.
Inspecting The Jumper Cables
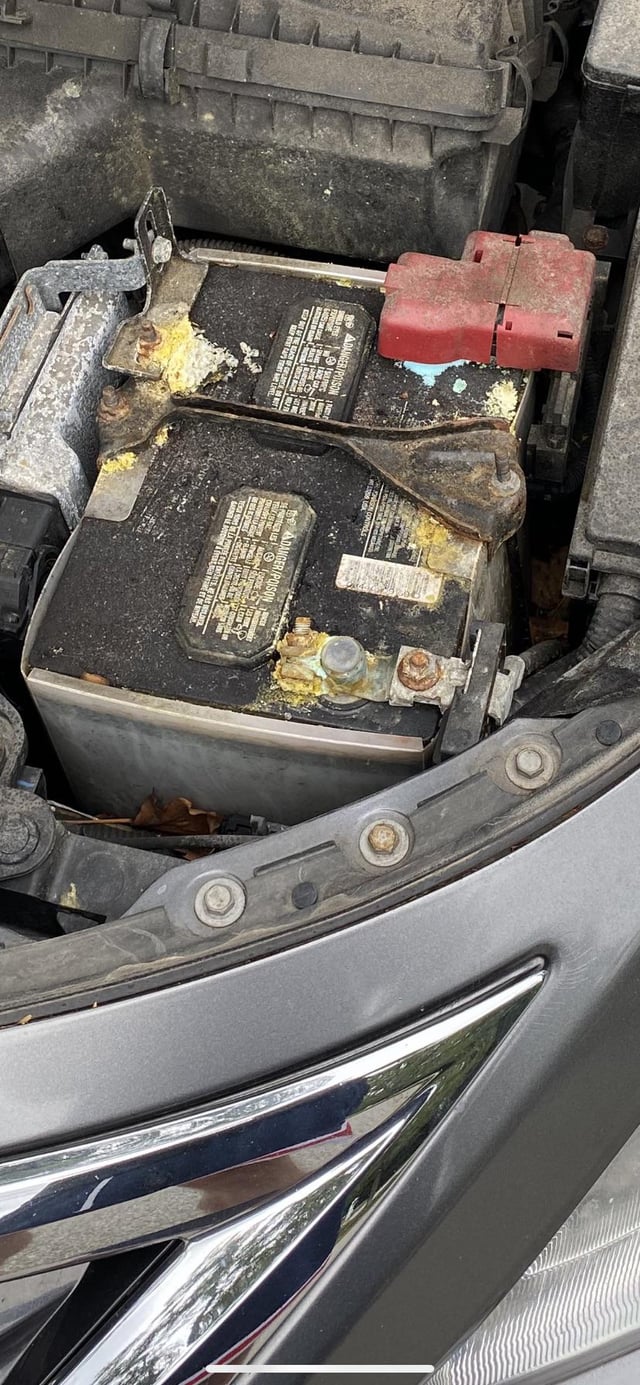
Examine the cables for damage. Look for any exposed wires or frayed sections. Damaged cables can cause electrical shorts. Replace them if necessary before proceeding. Ensure the clamps are firmly attached to the cables. Loose clamps can disconnect unexpectedly.
Wearing Safety Gear
Put on gloves to protect your hands from electrical shocks. Wear safety goggles to shield your eyes from sparks. These precautions can prevent serious injuries. Safety gear is essential when working with car batteries.
Turning Off The Engines
Turn off the engine of both vehicles. This reduces the risk of electrical surges. Ensure all electronics are off as well. Double-check the ignition is off before disconnecting cables.
Step-by-step Disconnection
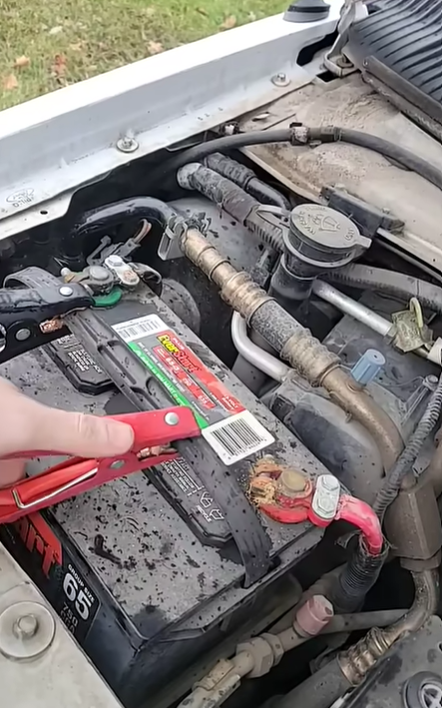
Learn how to disconnect jumper cables safely and effectively. First, remove the black clamp from the grounded vehicle. Next, take off the black clamp from the jumper vehicle. Finally, remove the red clamps in the same order. Follow these steps to ensure a safe disconnection.
Disconnecting jumper cables is an essential skill for anyone who owns a car. It ensures safety and prevents potential damage to your vehicle’s electrical systems. If you’ve successfully jump-started your car, the next step is disconnecting the cables correctly. This part of the process is crucial, yet many overlook it in their excitement to get back on the road. So, how exactly do you disconnect them safely? Let’s dive into the step-by-step disconnection process.
Read more: Car Struggles to Start But Battery is Fine: Hidden Culprits
Step 1: Turn Off The Engines
Before you begin, make sure both vehicles are turned off. This is a critical step to avoid any electrical mishaps. It’s tempting to rush, especially if you’re in a hurry, but safety should always come first.
Step 2: Remove The Black Cable From The Ground
Start by removing the black cable (negative) from the ground of the car that was jump-started. This step is often overlooked but is essential to avoid sparks. Remember, patience is key here.
Step 3: Disconnect The Black Cable From The Donor Car
Next, remove the black cable from the battery of the donor car. Make sure you have a firm grip and avoid touching any metal parts. Ever noticed how easy it is to skip a step when you’re in a rush? Slow down and ensure you do it right.
Step 4: Remove The Red Cable From The Donor Car
Now, it’s time to disconnect the red cable (positive) from the donor car. This step is straightforward, but it requires your full attention. Double-check that you’re removing the right cable; it’s easy to mix them up if you’re distracted.
Step 5: Disconnect The Red Cable From The Jump-started Car
Finally, remove the red cable from the car that was jump-started. You’ve now safely disconnected all the cables. Take a moment to double-check your work; ensuring everything is in order can save you from future headaches. Have you ever found yourself in a similar situation and wished you knew these steps? It’s a small effort that can make a big difference in keeping your car and yourself safe. Remember, practice makes perfect, so don’t hesitate to review these steps until you’re comfortable.
Post-disconnection Checks
After disconnecting jumper cables, it’s essential to conduct some checks. These ensure your vehicle is safe and ready to drive. Neglecting this step can lead to unexpected issues. Let’s dive into what you should examine post-disconnection.
Check Battery Connections
Inspect the battery terminals. Make sure they are clean and tight. Loose connections can cause starting problems. Ensure no corrosion is present. If you find any, clean it immediately. Use a simple baking soda solution for this task.
Test Electrical Systems
Turn on the vehicle’s lights and radio. Check if they function properly. This step confirms the battery is delivering power. If any system fails, recheck the battery connections. Electrical issues may indicate deeper problems.
Monitor Engine Performance
Listen to the engine’s sound. It should run smoothly without hiccups. Pay attention to any unusual noises. These could signal engine troubles. Drive the vehicle briefly to ensure everything works correctly.
Observe Dashboard Indicators
Watch for any warning lights on the dashboard. These lights provide vital information. If any appear, investigate further. Consult your owner’s manual for guidance. Responding quickly can prevent major issues.
Inspect Cables And Tools
Examine the jumper cables you used. Ensure they are in good condition. Look for any wear or damage. Proper maintenance extends their lifespan. Store them properly after use to avoid tangles.
Maintain Vehicle Documentation
Update your vehicle records. Note the date and reason for the jumpstart. Keep track of any changes in performance. This documentation helps with future maintenance. It also aids in diagnosing recurring issues.
Frequently Asked Questions
How Do I Safely Disconnect Jumper Cables?
Ensure both vehicles are off. Remove cables in reverse order. Start with the negative cable.
What Order To Disconnect Jumper Cables?
Begin with the negative cable from the working battery. Then remove the negative from the dead battery.
Can I Damage My Car While Disconnecting Cables?
Improper disconnection can harm your car’s electrical system. Follow correct procedures to prevent damage.
Why Disconnect Jumper Cables In Reverse Order?
Reverse order prevents sparking. It ensures safety by minimizing electrical discharge risks.
Is It Necessary To Check Battery Health After Jump-starting?
Yes, checking battery health ensures it’s functioning properly. It can prevent future starting issues.
Conclusion
Disconnecting jumper cables is easy with the right steps. Start by removing the black cable from the vehicle that was jump-started. Then, take off the black cable from the working vehicle. Next, remove the red cable from the working battery.
Finally, detach the red cable from the jump-started vehicle. Always follow this order for safety. This prevents any potential sparks or electrical issues. Practice makes perfect. Stay safe while handling car batteries. Remember these steps next time you jump-start a car.
Safe driving!
As Amazon Associate, we earn from qualifying purchases.